Issue a card to someone yourself and send it to them, from the dashboard or the scanner.
Most customers add themselves by scanning your card’s QR code or link. But you can also enrol someone yourself and send them the card directly.There are two places to do this:
The Customers page (on the dashboard): the full version, where you can issue any card type and set opening values.
The Scanner (the till screen): a quick version for staff serving customers at the counter.
Your team can have three roles, and the role decides where a person can add customers. The flow itself is decided by the screen, not the role: the Customers page always gives the full version, the Scanner always gives the quick version. An admin using the scanner gets the same quick flow that scanner staff get.
Role
Can add customers from
Notes
Admin
Customers page and Scanner
Full access to everything, across all locations.
Manager
Customers page and Scanner
Works within their assigned location(s). Has customers, notifications, and the scanner, and can see their own billing page, but not the Cards area or the business billing.
Scanner
Scanner only
Confined to the scanner screen at their assigned location, so the quick flow is their only way to add someone.
On the Customers page, click Create Customer (top right). It walks through four steps and lets you issue any card type, including gift cards, and set opening values.
1
Select Card
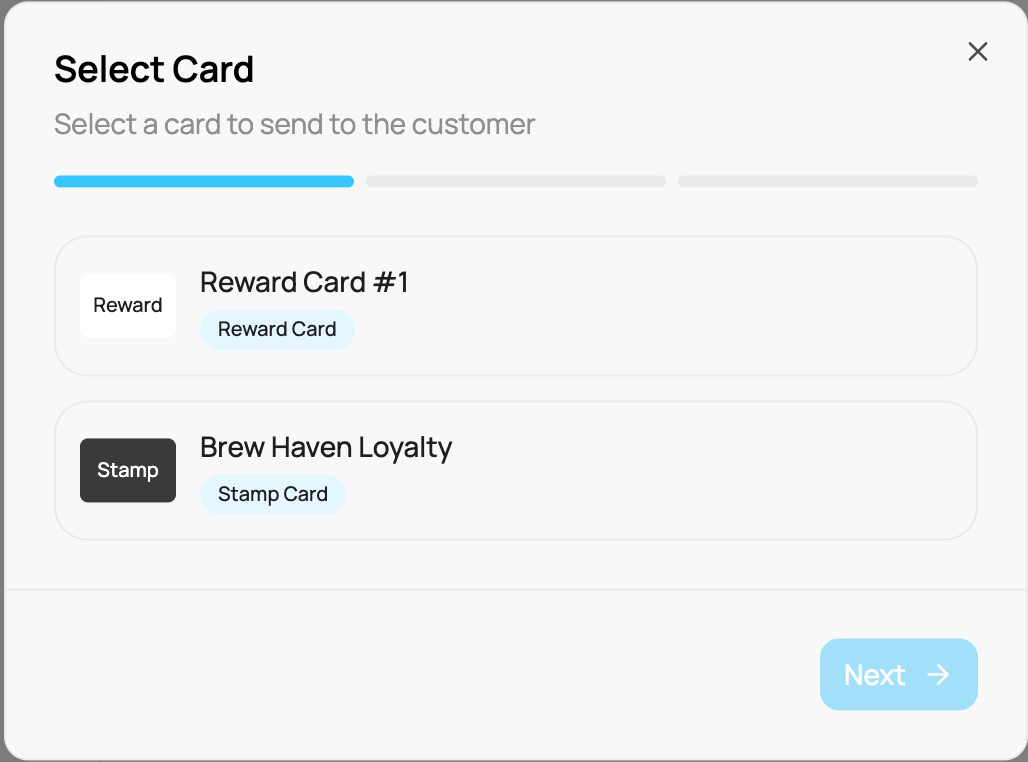
Pick which of your cards to send. The list shows each card with its type (Stamp, Reward, Gift Card, and so on). Select one and click Next.
Step 1: Select Card
2
Customer Details
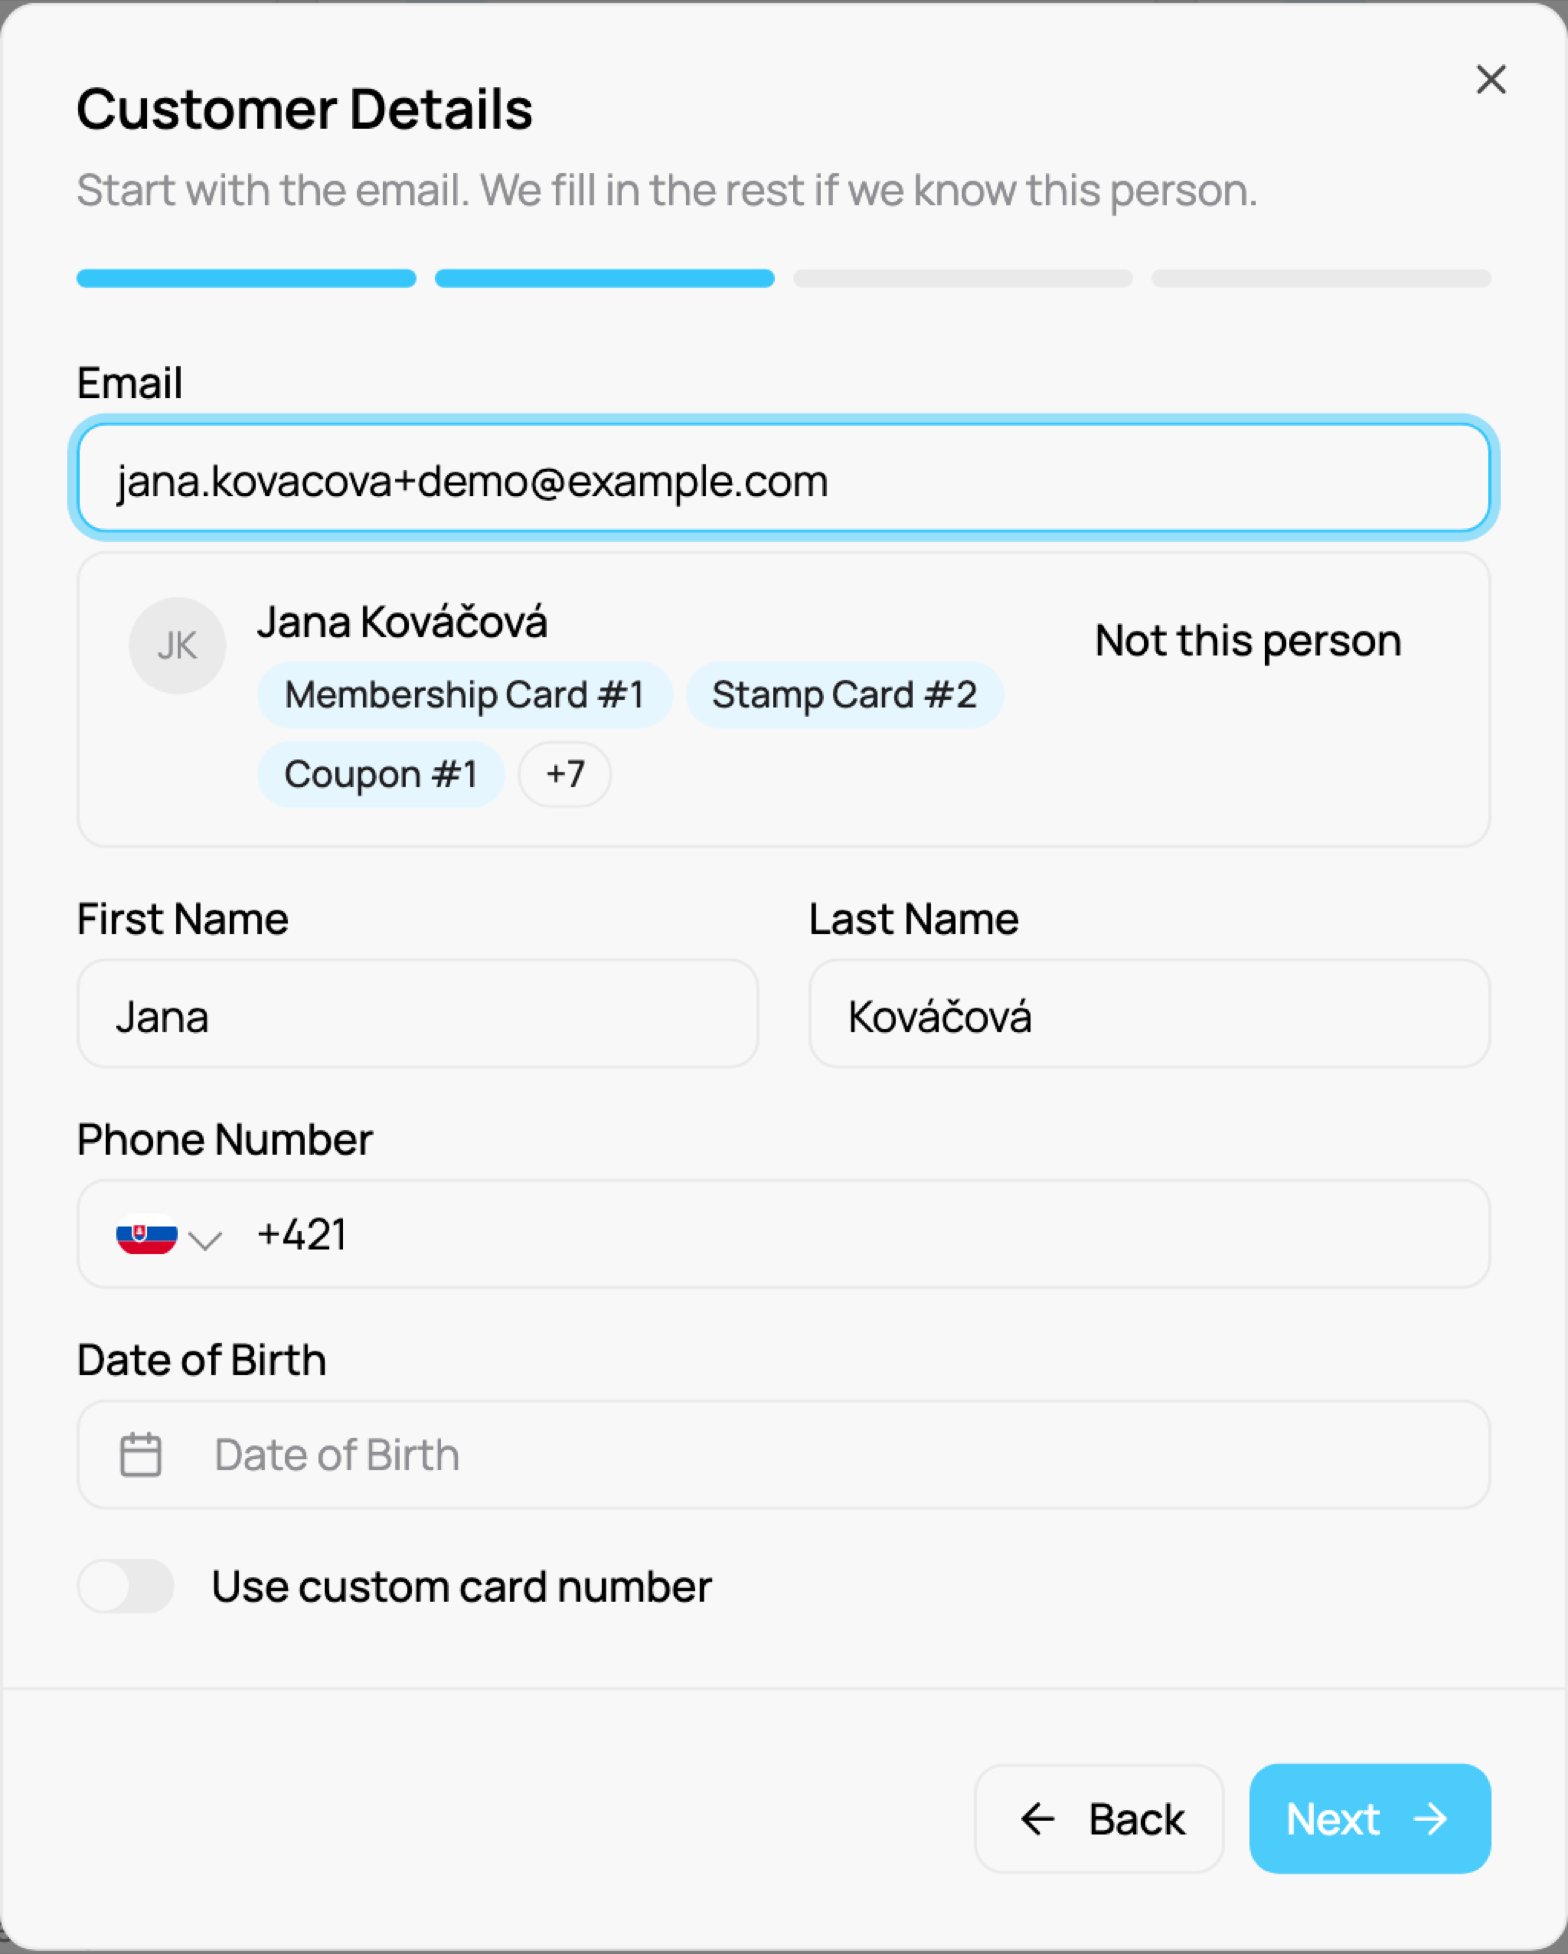
Start with the Email. If this person already has one of your cards, VEXiON cards finds them as soon as the address is complete:
You see their name and the cards they already have.
First Name and Last Name fill in by themselves.
Phone Number and Date of Birth show From profile. The new card gets them automatically. Click Change to type a different value.
Not the right person? Click Not this person and fill in the form yourself.
Step 2: a customer you already know
For a new customer, enter the details yourself:
Email. Tap a suggestion such as @gmail.com to finish the address.
First Name and Last Name.
Phone Number (with country code). A phone number is what enables sending by SMS later. Without an email, a phone number of a known customer also finds them. If several customers share the number, pick the right one or choose New customer with this number.
Date of Birth.
Use custom card number: turn this on to give the card your own reference instead of an automatic one. This value becomes the card’s number and is encoded into the QR code on the customer’s wallet pass, so it is handy for matching an existing physical card or a number from your POS: scanning either resolves to the same customer. It can be letters, numbers, hyphens, and underscores (up to 64 characters), and cannot be a 24-character hex string (that format is reserved for the system’s own IDs). Leave it off and the system assigns a number automatically.
If the customer already has this card, the email turns red and you cannot continue. Click Open customer profile to see them, or Pick another card.First Name is required. Give an email, a phone number or a custom card number. Email is required unless you use a custom card number (for customers without an email, such as a printed card) or the customer is already known. With only a card number there is nothing to send, so you hand the card over yourself. Click Next.
3
Card Values
Set the card’s starting values. This step depends on the card type, and is skipped entirely for coupon cards (there is nothing to set):
Stamp card
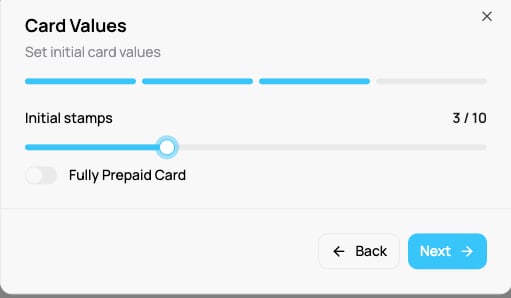
Initial stamps: a slider from 0 up to the card’s stamp goal, to give the customer a head start.If the card has Paid in advance on, a Fully prepaid toggle also appears, to issue the card already paid up.
Reward card (including cashback)
Initial reward points: the points balance to start the customer with.
Gift card
Gift card value: the starting balance, in your currency.A gift card you issue here is not a sale, because no money was received. The card’s Activity shows Gift card issued by merchant, it does not count in Sold, and you get no sale email.
Discount card
Total spend: the amount of spend to seed the customer with. The dialog shows the card’s discount tiers and highlights which tier the customer will start in based on the amount you enter.For an employee card there is no starting balance. Instead you see a read-only summary of the monthly limit, the reset day, and the discount tiers.
Membership card
Membership duration: pick one of the plans set up on the card (each shows its price). A Pre-activate membership toggle lets you start the membership as active immediately.
Coupon card
No values to set, so this step is skipped.
Click Next.
Step 3: Card Values (stamp card shown)
4
Delivery
Choose how to send the card:
Send via Email: enabled when the customer has an email.
Send via SMS: enabled only when you added a phone number in step 2 (otherwise it is greyed out).
Preferred Language for the message.
Review the Summary (card, customer, and delivery method), then click Send Card.
When a customer already has one of your cards, you can send them another one in a few clicks. Nothing needs to be typed again.
Customer profile: open the customer and click Give another card next to the card button (on a phone: Another card).
Right after sending a card from the Customers page: click Send another card in the confirmation message.
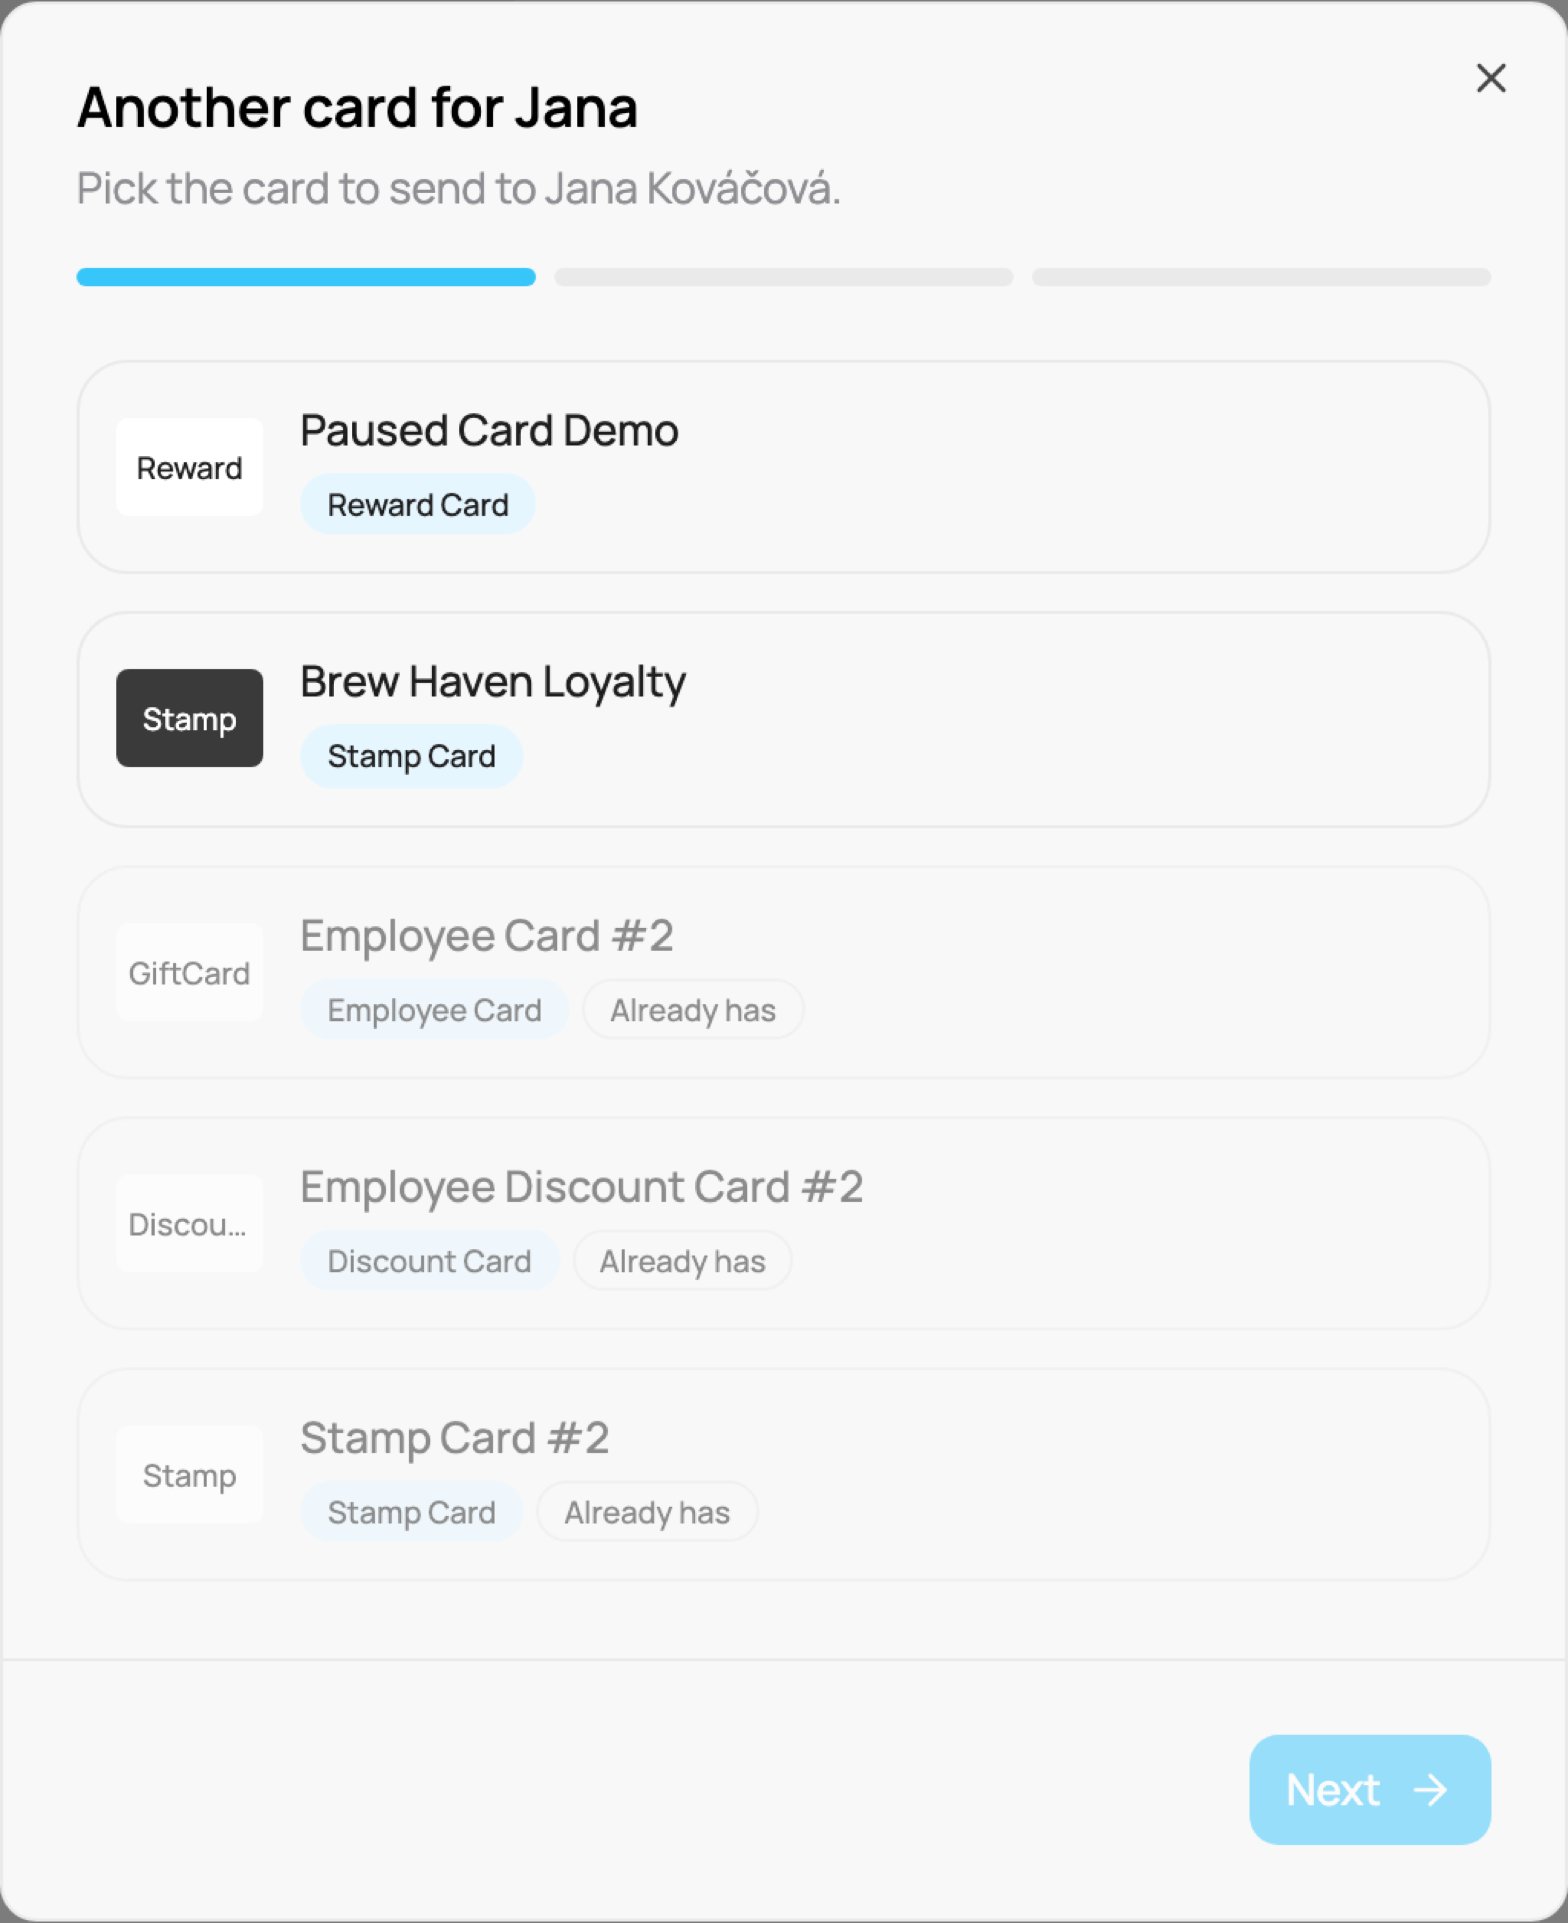
On the Scanner, use New customer and type the email: a known customer is found and filled in.Pick the card. Cards the customer already has are greyed out with Already has. The customer details step is skipped: VEXiON cards uses the details you already have. Then set the card values and send.
Give another card: cards the customer already has are greyed out
Staff serving customers at the counter can add someone straight from the Scanner. Tap New customer (top right of the scanner screen) to open the same wizard, streamlined for the till.
The 'New customer' button on the scanner
It works the same way, with three differences that keep it fast and safe at the counter. These apply to anyone using the scanner, whatever their role:
No Card Values step (three steps, not four)
The scanner skips the Card Values step entirely. Every card is issued in its starting state (a stamp card with no stamps, a reward card with no points, and so on). Staff cannot set opening balances or stamps, so a mistap can never hand out value. The flow is just Select Card → Customer Details → Delivery.
Gift cards and employee cards are not available
You cannot issue a gift card or an employee card from the scanner. Only your loyalty cards (stamp, reward, discount, coupon, membership) appear. Gift cards are sold and loaded through their own flow instead (see Physical Gift Cards).
Only this till's cards appear
The card list is scoped to the cards enabled at that scanner’s location, so staff only see the cards relevant to where they are working.
Everything else is identical: pick a card, enter the customer’s details (including a custom card number if you want one), choose Email or SMS, and send. A known customer is found from the email here too.After you send, the scanner opens the new customer straight away, so you can add the first stamp or points at once. If the customer already has the card, tap Show on scanner to open them.
In both places the customer is created and the card is sent in one go. They tap the link in the message to add the pass to Apple Wallet or Google Wallet, and they appear in your customer list straight away.
The email has the subject “Your card from [your business name]” and a friendly “You have a new card!” message, with a short welcome line for that card type, a preview of the card, and a button to add it to Apple Wallet or Google Wallet. For example, a stamp card reads:
[Your business] welcomes you with a new stamp card! Add it to your digital wallet and scan it at every purchase. Collect stamps and earn your reward!