

- The time period, the date range you pick at the top of the screen.
- The location, chosen in the location selector.
The location selector
If you have more than one location, a location selector scopes what you are looking at.- On desktop it sits at the top left of the sidebar. It shows your current scope, All Locations by default, and opens under Filter by location.
- On mobile the same control lives in the navigation menu.
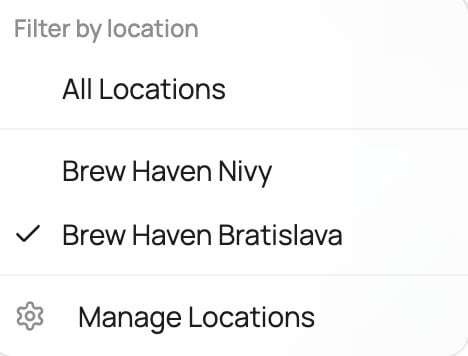
The location selector in the sidebar
This selector is not where you create or edit stores. It only filters what you are viewing. To add, rename, or configure a location, use Settings → Locations (see Locations).
The Online entry
If you make sales that are not tied to a physical store (for example online gift-card purchases or e-commerce orders), a virtual Online entry appears at the bottom of the list, marked with a globe icon. It groups those online sales, so you can see your online activity on its own or fold it into the total. The entry shows up once you have online activity, so if you only sell in store you will not see it yet. When it does appear, Online shows only in this filter. It is not a real store: you will not find it in Settings → Locations, and staff cannot scan against it.Knowing what you are looking at: the location chip
Whenever a location filter is active, a blue chip appears next to the page title so it is always clear which store’s data you are reading:- One location selected: the chip shows that location’s name.
- Two or more: the chip shows a count such as 2 locations; hover it to see the full list, one name per line.
- All Locations: no chip, because nothing is being narrowed.

The location scope chip next to a page title
”Records with no assigned location”
When you filter to a specific location, you may see a small note like “12 records in this period have no assigned location” on the dashboard or a card’s Activity tab. These are transactions that are not tied to any store. That usually means:- They were recorded before location tracking was in place (older, historic transactions).
- They came through a channel that is not linked to a store.
- The note only shows when a location filter is active, because with All Locations everything is already included.
- Every new transaction is automatically attributed to the right location (see How transactions get their location). Older transactions without a location stay unassigned.
An unassigned record is a data-completeness detail, not an error.
Where the location filter applies
Once set, the location scope follows you across the app:The first dashboard tile, New customers, counts first-time enrollments in the selected period and location. With a location filter active it answers “how many new customers did this store gain in this period”, not an all-time total.
Who sees which locations
The selector respects each team member’s access (see Team & Roles):- Admins / owners see all locations and can switch freely.
- Managers see only the locations assigned to them.
- Scanner staff are tied to their own location; the Scanner records against that store automatically.
How transactions get their location
Going forward, attribution is automatic, so your per-location numbers stay correct without any manual work:- Sign-up links and QR codes are per location. A customer who joins through a store’s link is attributed to that store (see the Registration Link section in Locations).
- POS transactions carry their branch. When a sale comes from a connected POS (such as Dotykačka), the branch it happened at maps to the matching VEXiON location.
- The Scanner uses its active location. A transaction entered through the Scanner is recorded against the location the device is set to.
- Online sales are grouped under the Online entry, unless they came through a specific store’s online link, in which case they are credited to that store.