

POST to that URL within seconds. No polling, no delay.
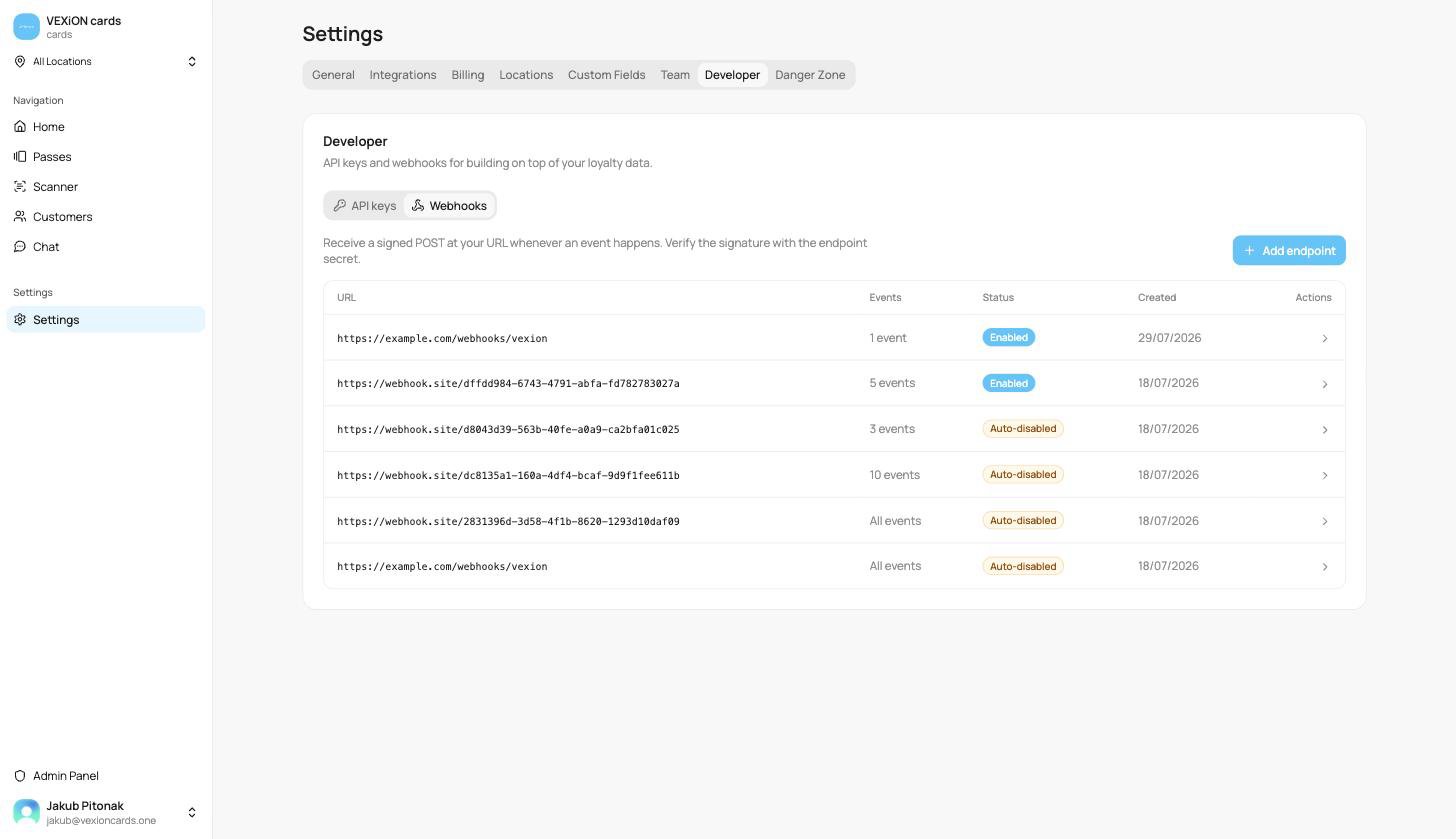
Settings → Developer → Webhooks
Adding an endpoint
1
Open the Webhooks tab
Go to Settings → Developer and switch to the Webhooks tab, then click Add endpoint.
2
Enter your URL
Paste the Endpoint URL that will receive the events. It must be a public HTTPS address that can accept
POST requests, for example https://yourshop.com/webhooks/vexion.3
Choose which events to receive
Pick the events you care about, or turn on All events to receive everything.
4
Copy the signing secret, once
Click Add endpoint. Your signing secret is shown one time only, copy it and store it in your receiver, you will need it to verify signatures.
Choosing events
Every event has a name in the formsubject.action, for example customer.created, transaction.created, or card.updated. They are grouped by subject (customer, card, transaction, and so on) so you can tick a whole area at once.
Turn on All events to subscribe to every current and future event, this is the simplest choice and means you never miss a newly added event type. Or leave it off and tick only the specific events your integration handles.
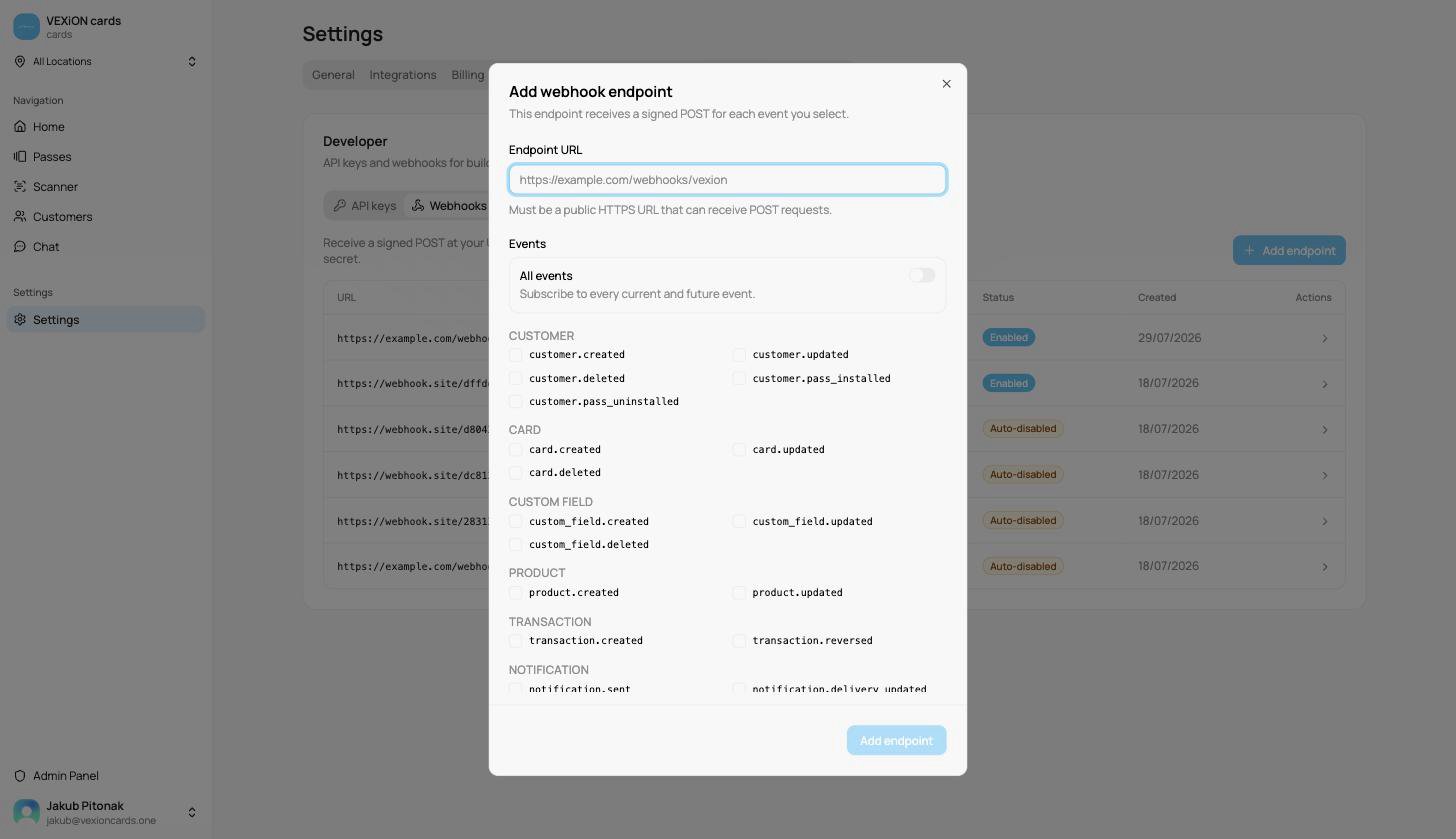
Adding an endpoint and choosing its events
You can see the exact catalogue of event types, and the shape of each payload, in the Webhooks API reference. To understand how one event relates to the delivery log and the account-wide event feed, see Events, deliveries, and endpoints below.
Verifying signatures
Every request VEXiON cards sends is signed with your endpoint’s signing secret. Your receiver should recompute the signature and compare it before trusting the payload, this is what proves the request really came from VEXiON cards and was not tampered with. The step-by-step verification recipe is in the Webhooks API reference.Rotating the secret
Open an endpoint and choose Rotate secret to replace it, for example on a schedule, or if it may have leaked. The new secret is generated immediately, and the old one keeps working for 24 hours so you can update your receiver without missing a single delivery.Deliveries and retries
Open any endpoint to see its Recent deliveries, one row per attempt to send an event to that URL, with the event type, the result, and when it happened. Filter by All, Failed, or Delivered.
If a delivery fails, VEXiON cards retries automatically with increasing delays. You can also press Retry on any delivery to send it again by hand.
Your endpoint should reply with a
2xx status as soon as it receives the event, and do the slow work afterwards. Answering quickly is what marks a delivery Delivered; a slow or erroring reply is treated as a failure and retried.Enabled, disabled, and auto-disabled
An endpoint is Enabled while it is receiving events. You can Disable it at any time from its menu, and Enable it again later. If an endpoint keeps failing for a long time, or its server reports that the URL is permanently gone, VEXiON cards sets it to Auto-disabled and stops sending. Fix your receiver, then re-enable the endpoint to resume.Testing an endpoint
Use Send test event to fire a signed sample event at your URL right now, without waiting for a real one to occur. Pick a specific event type or send the default sample. The result (the response code and how long it took) is shown immediately. A test does not create a delivery record.Events, deliveries, and endpoints
Three closely related ideas are easy to mix up. They are not duplicates, each answers a different question:
One event fans out to every enabled endpoint subscribed to it, and each of those attempts is a delivery. In the API, the account-wide event feed is
GET /v1/events; the per-endpoint attempt log is that endpoint’s deliveries list.
Next steps
Create an API key
Webhooks tell you what happened; an API key lets you read and change data in return.
Webhooks API reference
Event catalogue, payload shapes, and the signature-verification recipe.