

Names, prices, and categories come from Storyous and are read-only in VEXiON. In VEXiON you only set the loyalty part (whether a product earns points, how many, and any redemption).
Syncing the menu
After connecting (see Connecting and setup), pull your products in. For each connected place, click Sync Menus.Re-syncing is safe. When you sync again, product names, prices, and categories are refreshed from Storyous, but the loyalty settings you have already set are preserved. New products arrive with Loyalty: Yes and every number at 0 until you set them, so a freshly synced menu earns nothing until you fill it in.
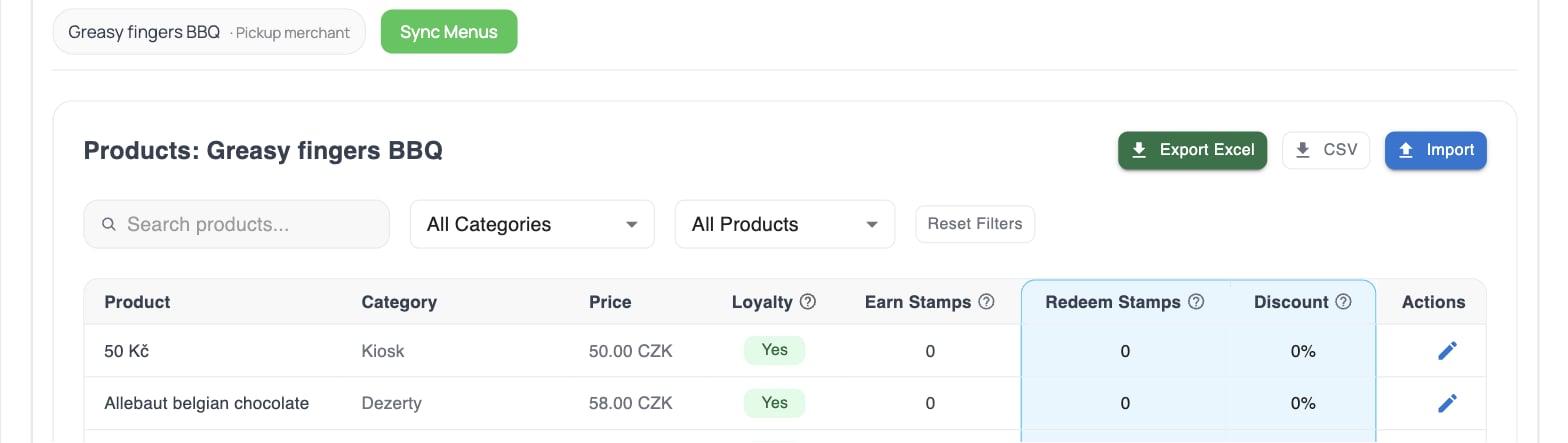
Syncing a place's menu from Storyous
The product table
After syncing, the Products table (headed with the place’s name) lists every product. The columns adapt to the card type you enabled:The column headings follow your card type. With Stamp cards they read Earn Stamps and Redeem Stamps; with Reward Cards they read Earn Points and Redeem Points. Switching the card type in the integration settings renames them immediately.
In Credit Cashback mode only Earn Points shows, because points convert to a flat euro credit, there is nothing to “redeem” per product. In Stamp and Product Rewards modes you also get Redeem and Discount.
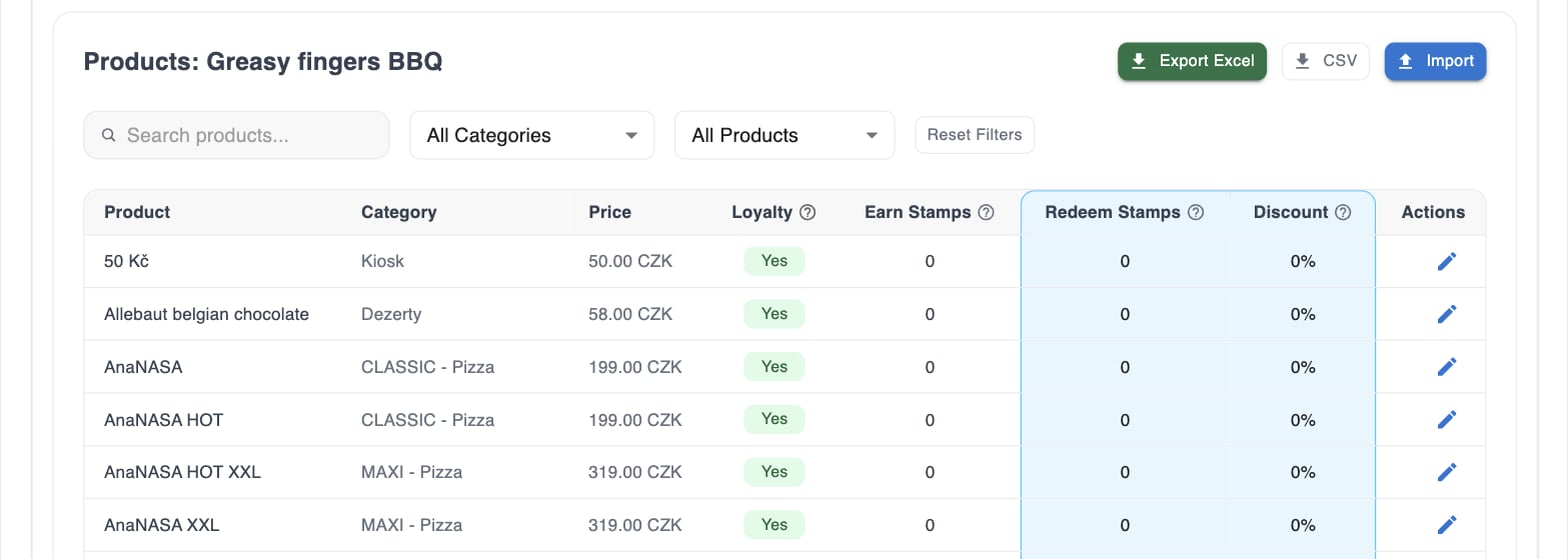
The synced product table with loyalty columns
Finding products
Above the table:- Search by product name.
- All Categories filters by category.
- All Products filters by loyalty status (all / enabled / disabled).
- Reset Filters clears them.
- Show N per page (10, 20, 50, 100) and page navigation for large menus.
Editing a product
Click the pencil on a row to edit it inline. The row turns into fields: a Loyalty checkbox and a number box for each of Earn, Redeem, and Discount. Click the green save icon to keep the change, or the red cross to discard it. A saved row confirms with “Product updated successfully”.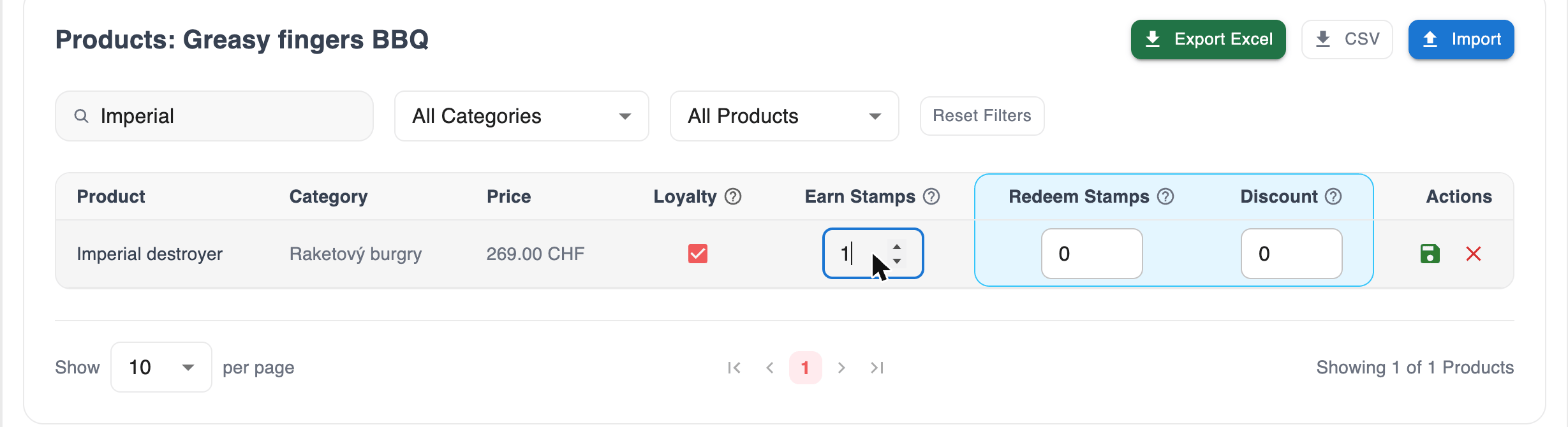
Editing a product's loyalty values inline
Bulk editing with import and export
For a large menu, editing every product by hand is slow. Export the products to a file, set the loyalty columns in a spreadsheet, and import them back.The recommended workflow
1
Sync the menu
Pull the latest products from Storyous.
2
Export
Click Export Excel or CSV to download all products with their current loyalty settings.
3
Edit in a spreadsheet
Set the loyalty columns for your products (details below).
4
Import
Click Import, drop your file, check the preview, and confirm.
The file columns
The export contains one row per product. You only edit the loyalty columns:For Reward cards,
earnPoints and redeemPoints may be decimals (for example 2.5, 10.75). For Stamp cards, whole numbers are recommended so customers see clean stamp counts (the system accepts decimals, but they make little sense for stamps).What the import dialog shows
Clicking Import opens Import Products from Excel or CSV. Before you pick a file it lists the rules:- Export your menu first using Export Excel, then edit the loyalty columns and import back.
- Editable columns:
loyaltyEnabled,earnPoints,redeemPoints,discount. - Stamp cards: use whole numbers only (1, 2, 3…) for
earnPointsandredeemPoints. With reward cards, decimals are supported. - Do not modify
productIdor the other columns, only loyalty settings are updated.
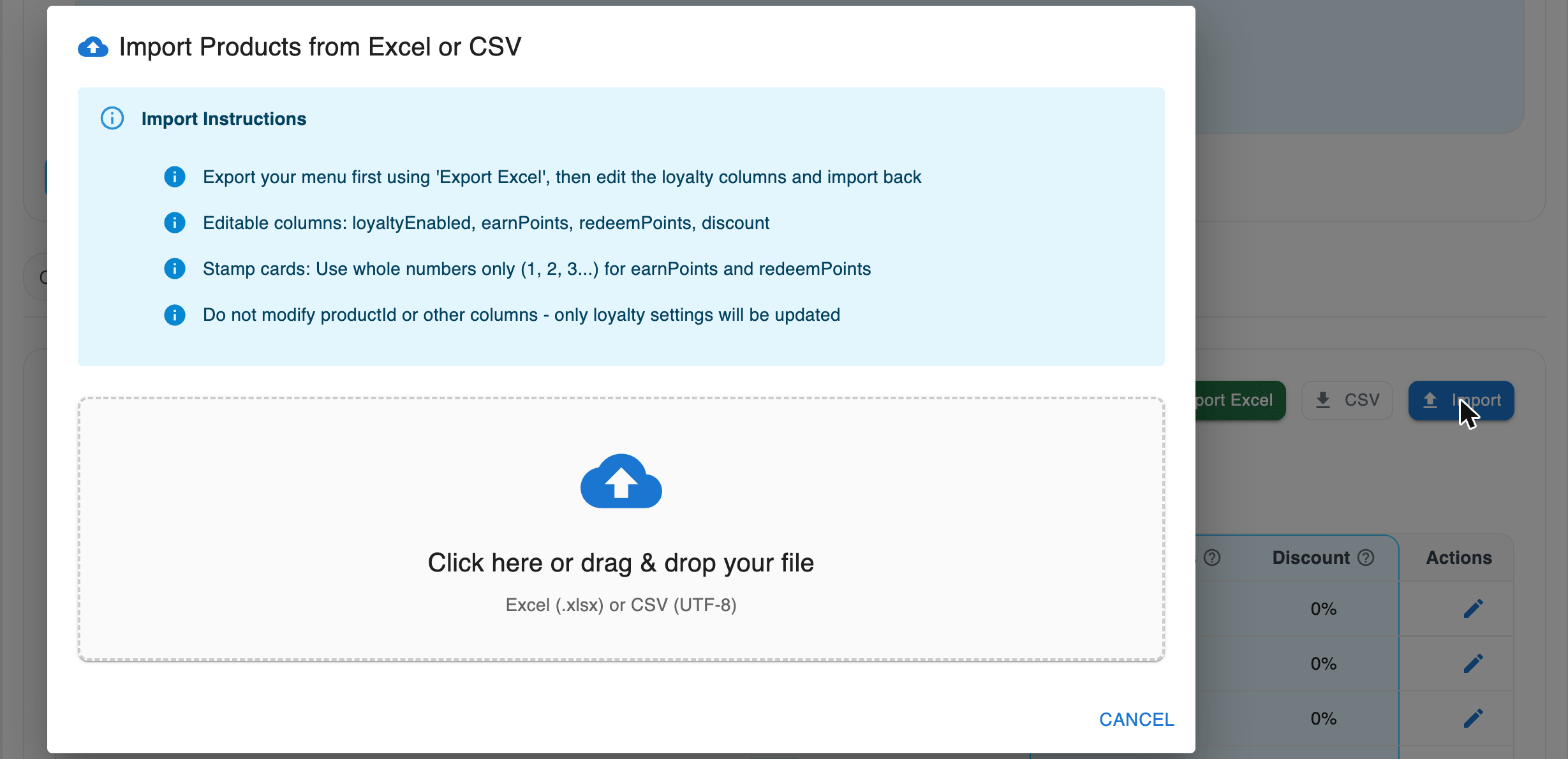
The import preview before confirming
The import summary
After you upload, a Confirm Import step appears before anything is saved. It names the file and shows:
with the reminder “This will update your product loyalty settings. Products with errors will be skipped.” The button itself carries the count, for example CONFIRM IMPORT (134 PRODUCTS). Nothing is written until you press it.
Only the loyalty columns are updated. Product names and prices are never changed by an import.
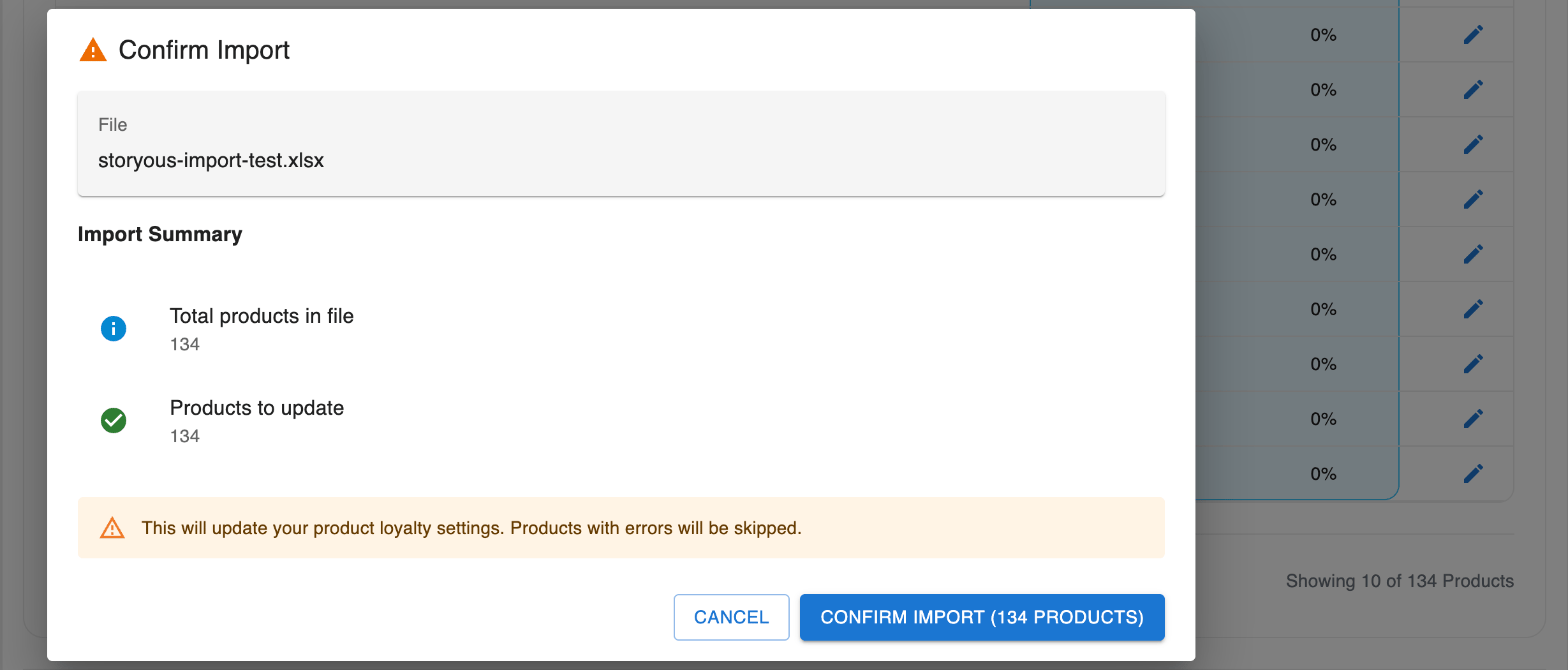
The Confirm Import step, before anything is written
“Imported” counts rows read, not rows changed. It is the number of valid rows in your file. Modified is what actually changed in the table. Rows whose
productId is not in this place’s menu are counted as not found and quietly do nothing, so a file that matches nothing still reports a healthy-looking imported count. If the two numbers are far apart, check you exported from the same place.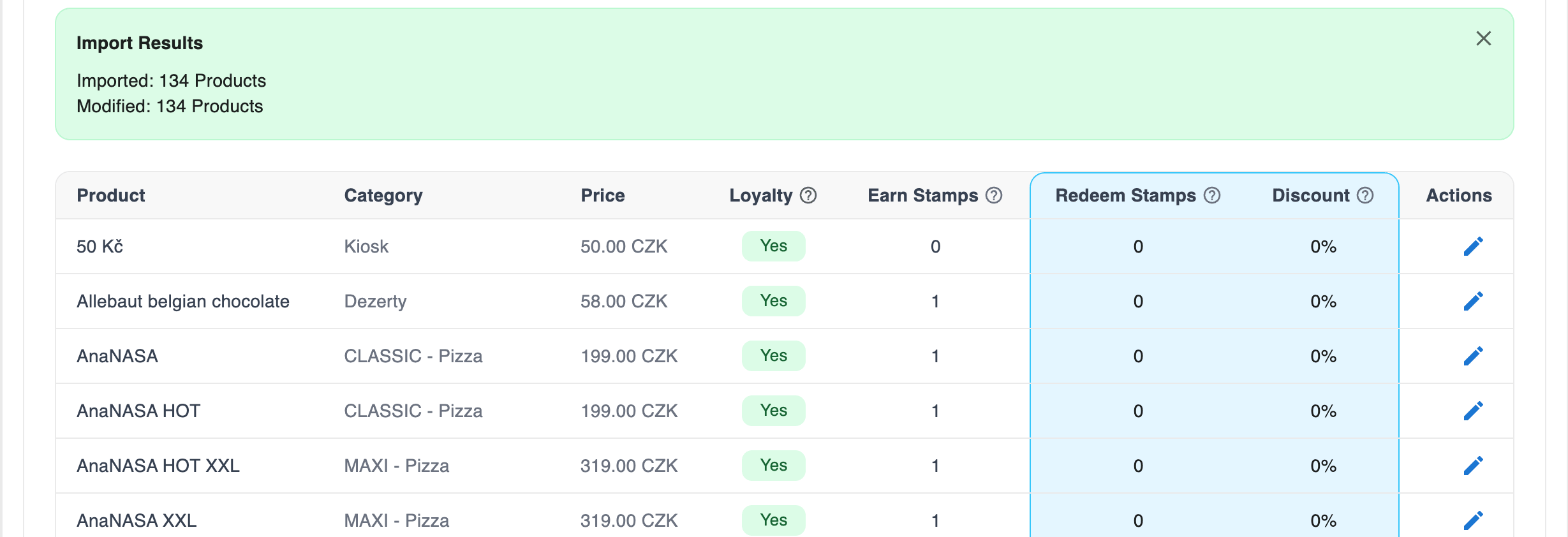
The result after a confirmed import
What to set next
How you fill inearnPoints, redeemPoints, and discount depends on your card type. See Card types and point setup for worked examples of each.