

Before you start: you must already have your first location connected (see Connecting & setup). You activate multi-cloud only after the first location is connected.
What multi-cloud is
Cloud vs POS terminal
In Dotykačka:- A cloud is a separate location with its own menu, products, and settings.
- A POS terminal is a till within one cloud (there can be several).
What it enables
- One VEXiON account → several Dotykačka clouds.
- Shared customers across the locations where their card is enabled.
- A unified program, points add up from every location.
- Central management in one place.
Each cloud has its own menu and products, but customers and points are shared across the clouds where their card is enabled. Turn a card on or off for a location in the location settings. A customer is copied to a cloud only if their card is enabled at a location mapped to that cloud. If you have not mapped any location to a cloud, every customer goes to it.
When to use it
Use multi-cloud if you own several locations with different concepts, each is a separate Dotykačka cloud, and you want one loyalty program across all of them. Do not use multi-cloud if you have one location with several tills (that is one cloud), you only have one cloud, or each location should have a completely separate program.Activating multi-cloud
Prerequisites:- ✅ Your first location is already connected (see Connecting & setup).
- ✅ You have access to the other Dotykačka clouds.
1
Click Activate Multi-Cloud
In the Dotykačka integration settings, find the Multi-Cloud Mode Available panel and click Activate Multi-Cloud.
2
Confirm by typing 'activate'
A dialog explains what multi-cloud does. To confirm, type
activate in the box and click Activate Multi-Cloud Mode.3
The system switches to multi-cloud mode
Your current cloud is migrated to the multi-cloud system, and an overview of your clouds appears, starting with your first location.

The multi-cloud activation confirmation
You can switch multi-cloud off again if only one cloud is connected. First disconnect all clouds except one.
Adding another cloud
1
Add a new cloud
In the Connected Clouds panel, click + Add New Cloud.
2
Sign in to Dotykačka
A sign-in window opens. Sign in with the account that has access to the new cloud, choose the cloud, and confirm.
3
Map the new branch
The Location Mapping dialog reopens, now listing every cloud’s branch. Your already-mapped branch shows a Change control; the new one offers Link to existing (pick a VEXiON location) or Create new. Set the new branch and click Confirm mapping.
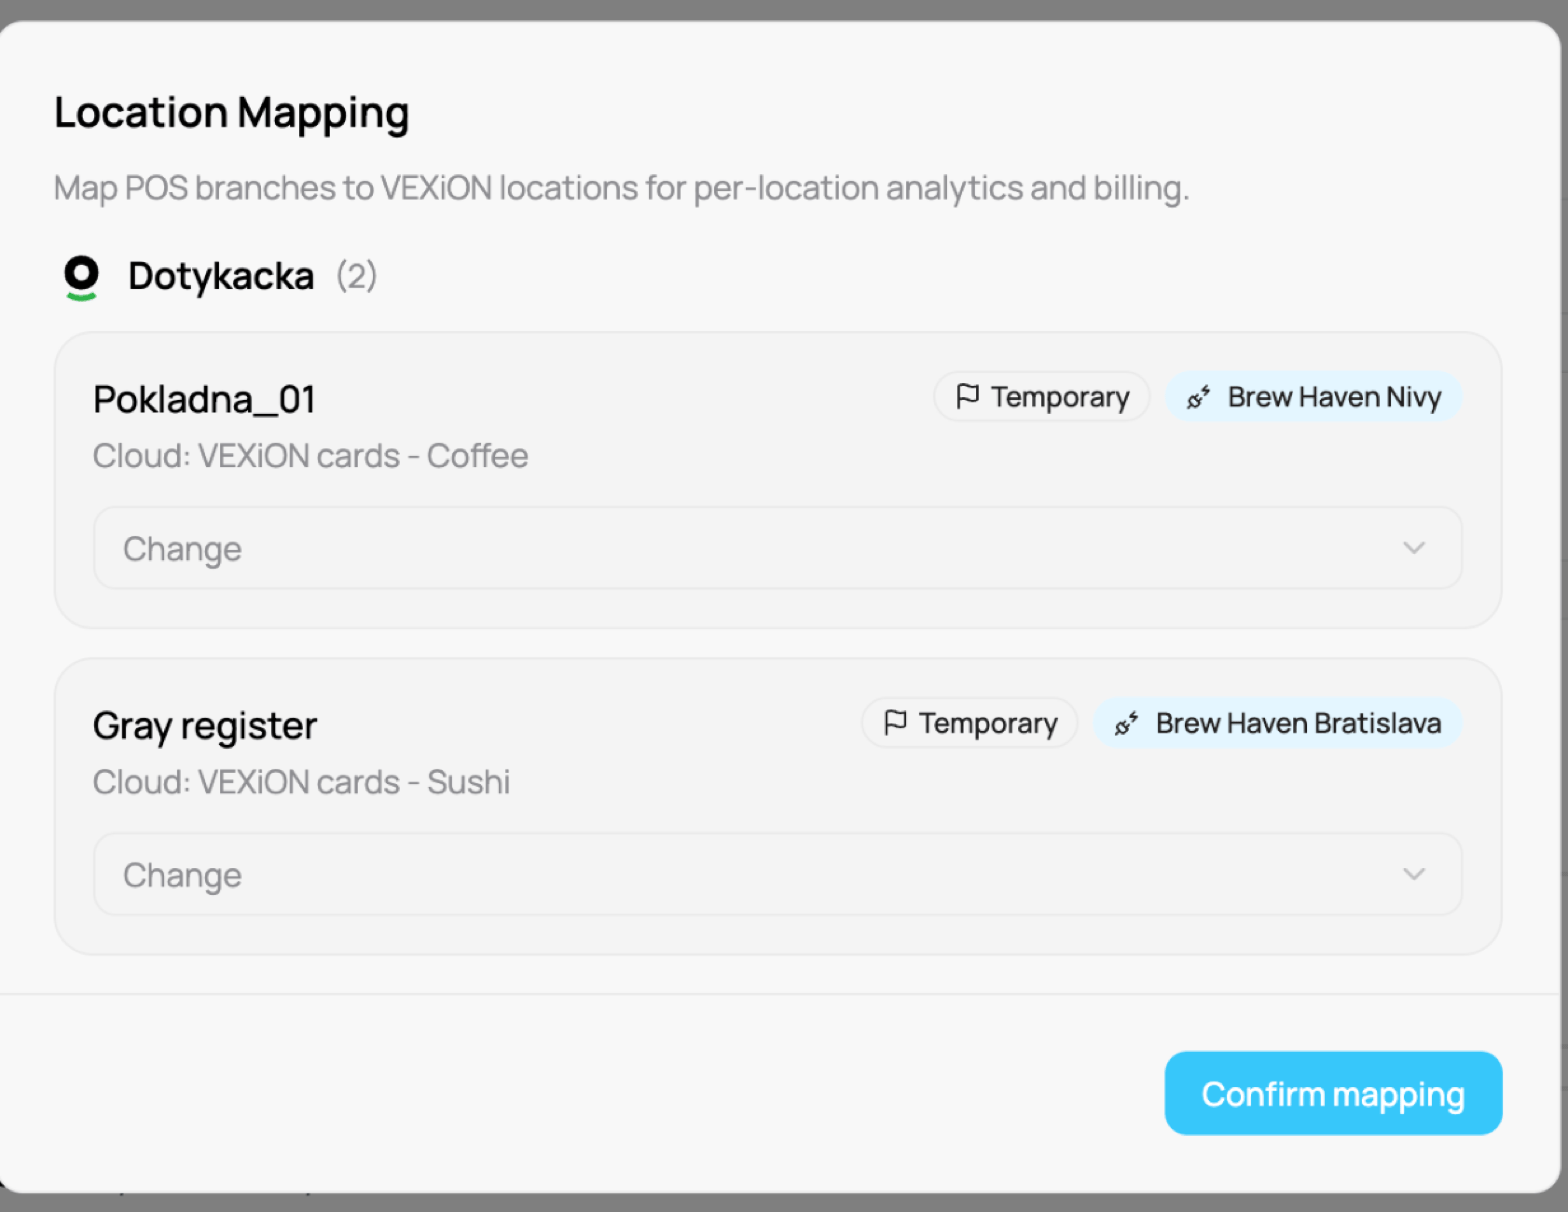
Mapping the branches of both clouds
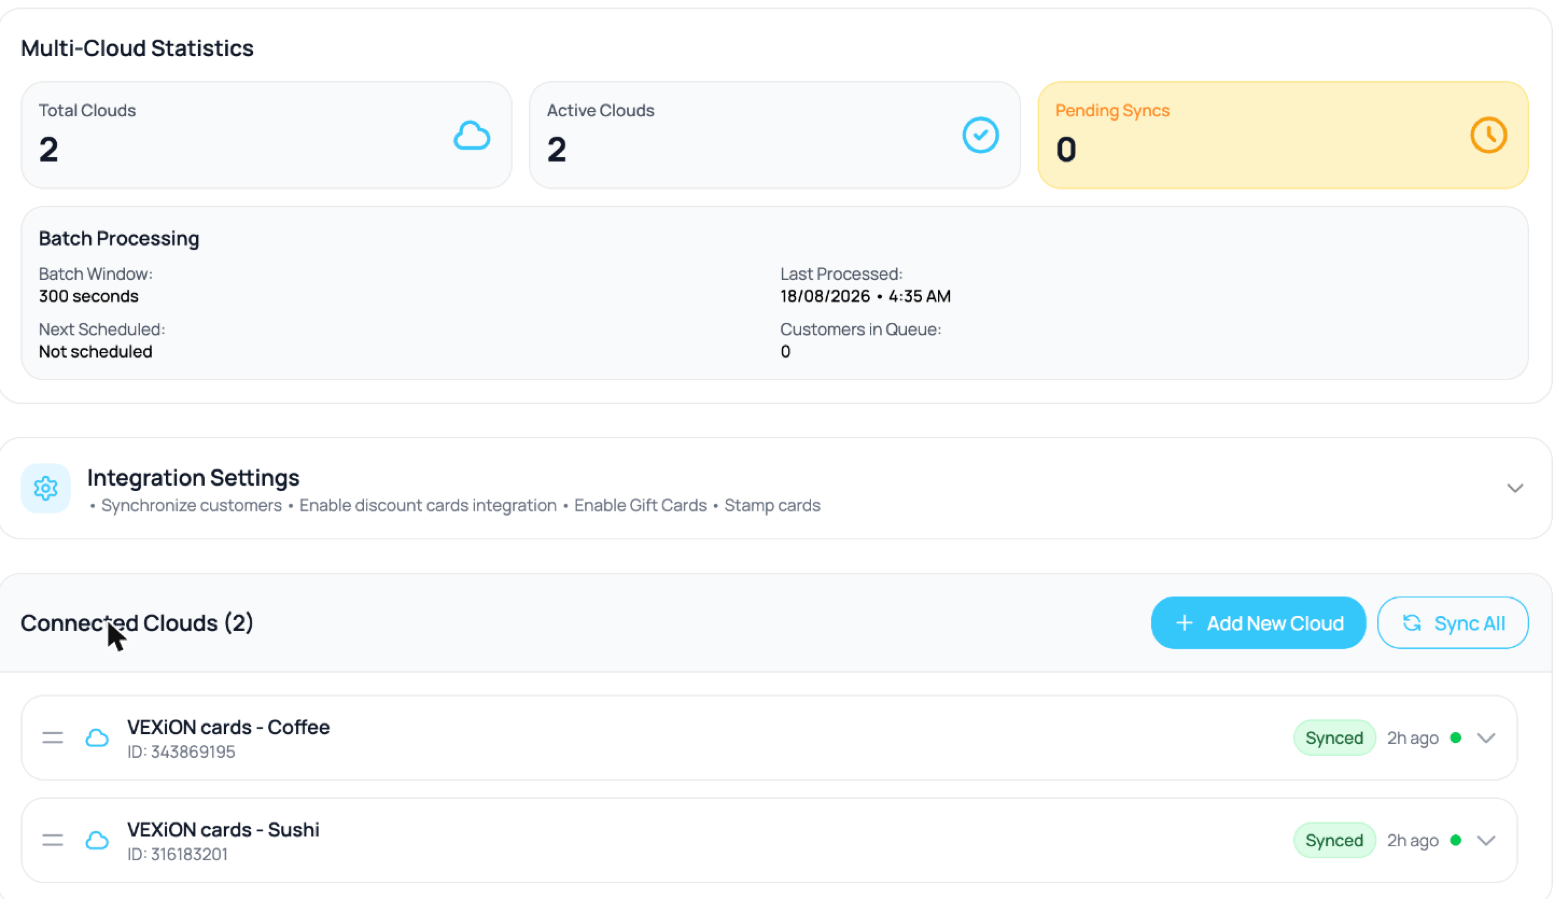
Two Dotykačka clouds connected under one account
Statistics overview
At the top of the multi-cloud view, a Multi-Cloud Statistics panel shows:
Below it, Batch Processing:
The Multi-Cloud Management header has Refresh and Disable Multi-Cloud (which returns you to single-cloud mode).
Managing clouds
Under Connected Clouds (N), each cloud is a card showing its name, cloud ID, a status badge (Synced / Never synced), and last sync. Expand a card for the detail:- Status (Active), Last Synced, Connected date, Webhook (Configured).
- Customers synchronized (for example “694 / 735”), Customers with pending updates, plus Partial Sync (N failed) and N customers excluded badges where relevant.
- Buttons: Sync (run an immediate customer sync for this cloud), Test (check the connection), and Remove (disconnect the cloud).
How sync works: the 5-minute window
VEXiON uses a 5-minute window to sync transactions across clouds. Why a window? It is faster and more reliable to sync in bulk than one at a time, and it does not overload the systems.
So a new customer is available instantly in every cloud where their card is enabled, while points appear within 5 minutes.
Setting up points in each cloud
You set the points on products in each cloud separately, through Dotykačka’s Remote administration: export the products, set thepoints column for your program, and import them back.
- Stamp cards: in each cloud, create a reward product (price 0€, negative points, for example -10). The negative points deduct stamps from the customer’s card.
- Cashback cards: in each cloud, create the special “Points redemption” product, with the same price per point everywhere (if 1 point = 0.01€ in one cloud, it must be the same in all).
Easy cashback setup
Two steps: in the “Points redemption” product set the price per point to 0.01€, and in your product export use the formula= price × 5 for 5% cashback (the multiplier is the cashback percent: ×3 = 3%, ×5 = 5%, ×7 = 7%).
When the customer redeems, 15 points × 0.01€ = 0.15€ back (exactly 5% of 3€).
Working at the till with multi-cloud
Customers are available in every cloud where their card is enabled. Staff find a customer by QR code (scan the wallet card with a physical scanner), or by search (name, phone, or email).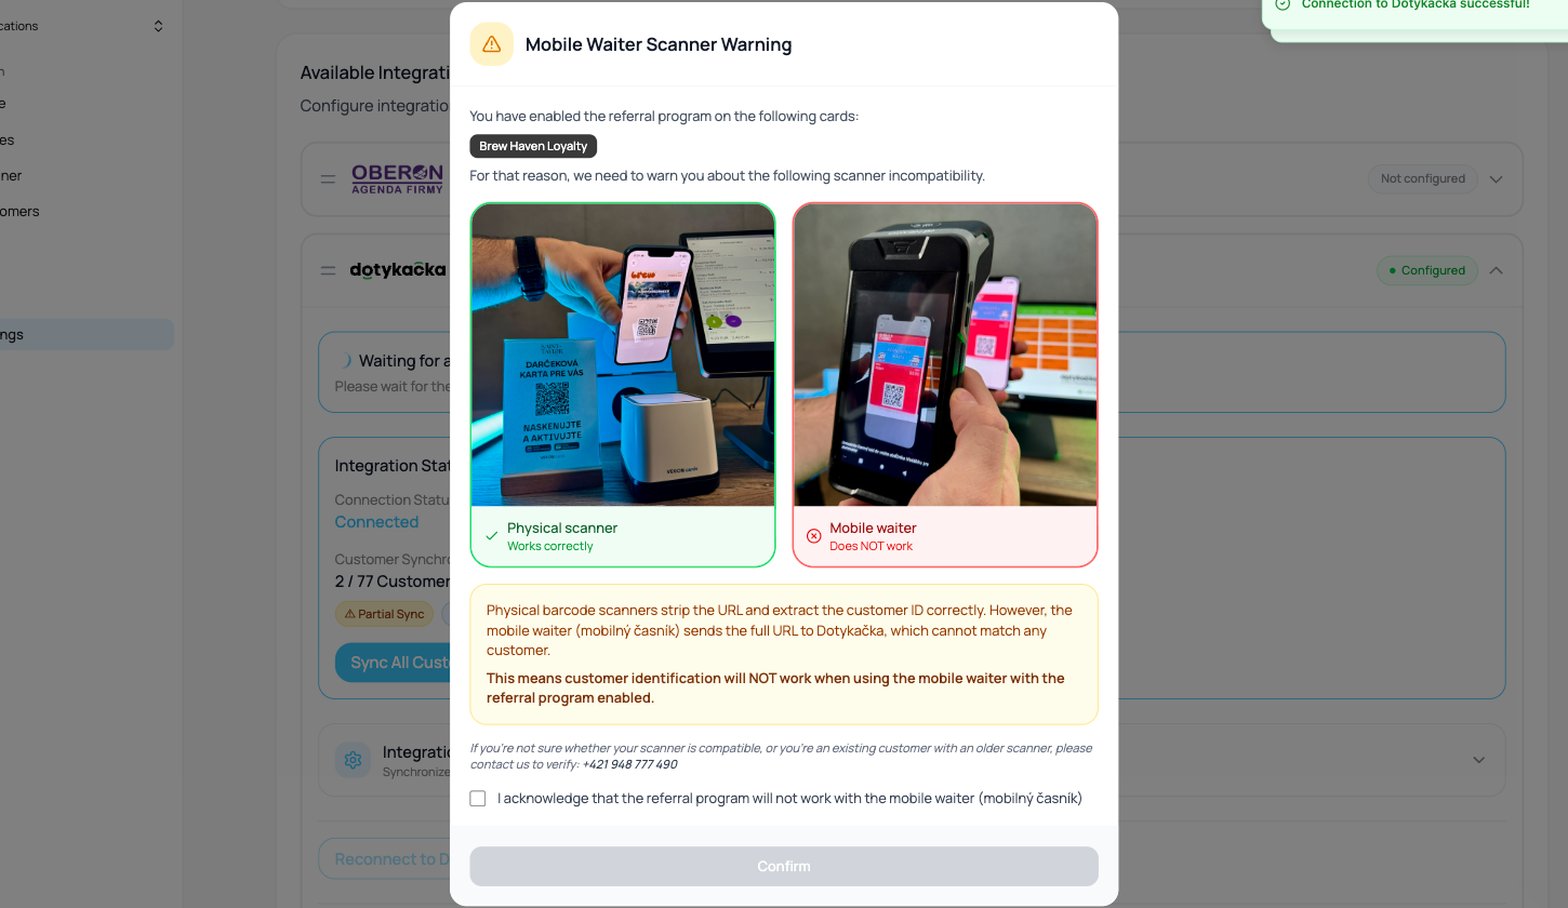
The mobile waiter scanner warning shown on connection
Limitations
Troubleshooting
- A cloud does not appear: check you have access to it in Dotykačka, try signing in again, and confirm it is not connected to another VEXiON account.
- A customer is not visible in a new cloud: wait for the sync (up to 5 minutes), check “Customers in queue”, or click Sync on the cloud.
- Points are not added: confirm the customer is assigned to the account in Dotykačka, that products have points set, and wait 5 minutes for the bulk sync.
- Different points in different clouds: export the products from each cloud, check the
pointsvalues match, and import them back.