

You need your Papaya URL and an API token generated in the Papaya admin. Generate it in Papaya under Administrácia → API (beta) → Nový token +.
Where to find the settings
- Sign in to the VEXiON admin.
- Open Settings in the sidebar.
- Select Integrations.
- Expand Papaya.
Step 1: API token
1
Name the location
Enter a Location Name (for example “Main Location”).
2
Enter your Papaya URL
Enter your Papaya URL. Use the address Papaya sent you, for example
https://api.papayapos.sk/external/<your id> or https://5.ppy.sk/youraccount. You can also paste the address of your Papaya admin page.3
Enter the API token
Paste the API token you generated in Papaya. You can click Test to check the connection. The test is optional, because VEXiON also checks the connection when it saves the location.
4
Next
Click Next. VEXiON saves the Papaya location and links it to a VEXiON location. If you have an unused VEXiON location, you can pick it. If you have none, VEXiON creates a new one without asking and shows “1 location created”. A VEXiON location it creates counts toward your per-location price, unless it fits in your already paid slots or a free slot granted to your account. VEXiON shows no price before it does this. If your Papaya account has several tills, the mapping dialog opens instead. See Mapping locations to VEXiON.
Two places ask for the same three fields. The steps above are the
first-time connection wizard, which has a Test button. Once the
integration is connected you add further locations from Manage Locations,
where the same Location Name, Papaya URL and API Token sit above an Add
Location button instead. The screenshot below shows that second form.
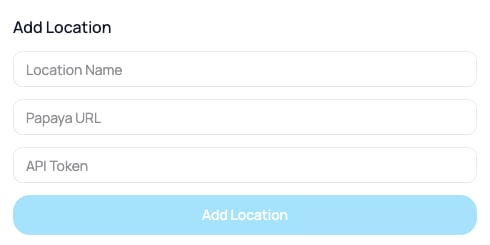
The same three fields as step 1, here in the Add Location form used once you are connected
Step 2: webhooks
VEXiON shows two webhook URLs and a token that you paste into Papaya so it can call VEXiON. In Papaya, go to Administrácia → Nastavenia → Vernostný program and:1
Switch TYPE to LOYALTY
Set the loyalty TYPE to LOYALTY (Loyalty Program).
2
Paste URL 1
Copy URL 1 from VEXiON (Reading discount, used when a card is scanned before the bill closes) into Papaya.
3
Paste URL 2
Copy URL 2 (Recording transaction, used after the bill closes) into Papaya.
4
Generate and paste the token
In VEXiON click Generate Token, copy it (it is shown only once), and paste it into Papaya.
5
Confirm
Back in VEXiON, click I’ve copied the token under the token. Then click Continue to Card Settings and confirm you have added all four items. The button stays inactive until you generate the token and confirm the copy.
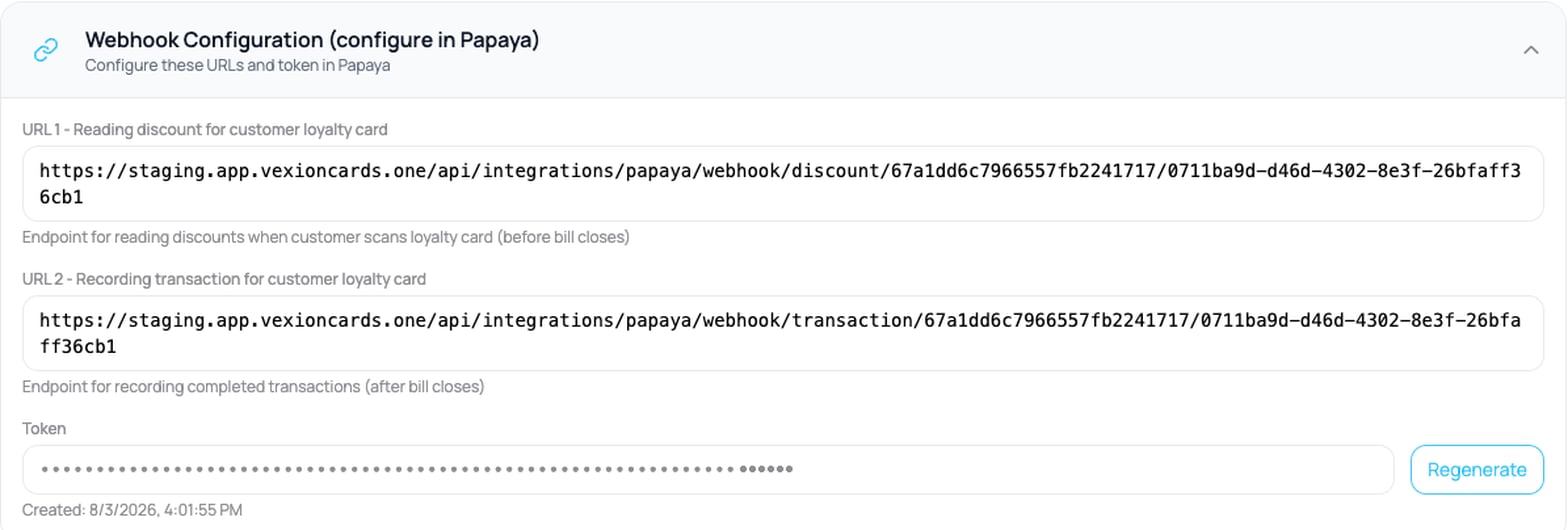
Step 2: the webhook configuration to paste into Papaya
Step 3: card settings
Choose which card types to run. A note reminds you which are on.
When Enable Point Cards is on, you choose the Point card type:
- Stamp cards: whole-number stamps.
- Reward Cards: points that convert to a euro cashback (set the Value of 1 Loyalty Point).
It is one or the other, not both. A location runs stamp cards or reward cards. Switching from one to the other stops the old type working at the till straight away, so change it only when you mean to move the whole programme across.
Switching to stamp cards rounds your product values. Reward cards allow decimals, stamps do not, so VEXiON asks you to confirm and then rounds every product’s earn and redeem value to a whole number in one pass. The confirmation says so before anything is written.
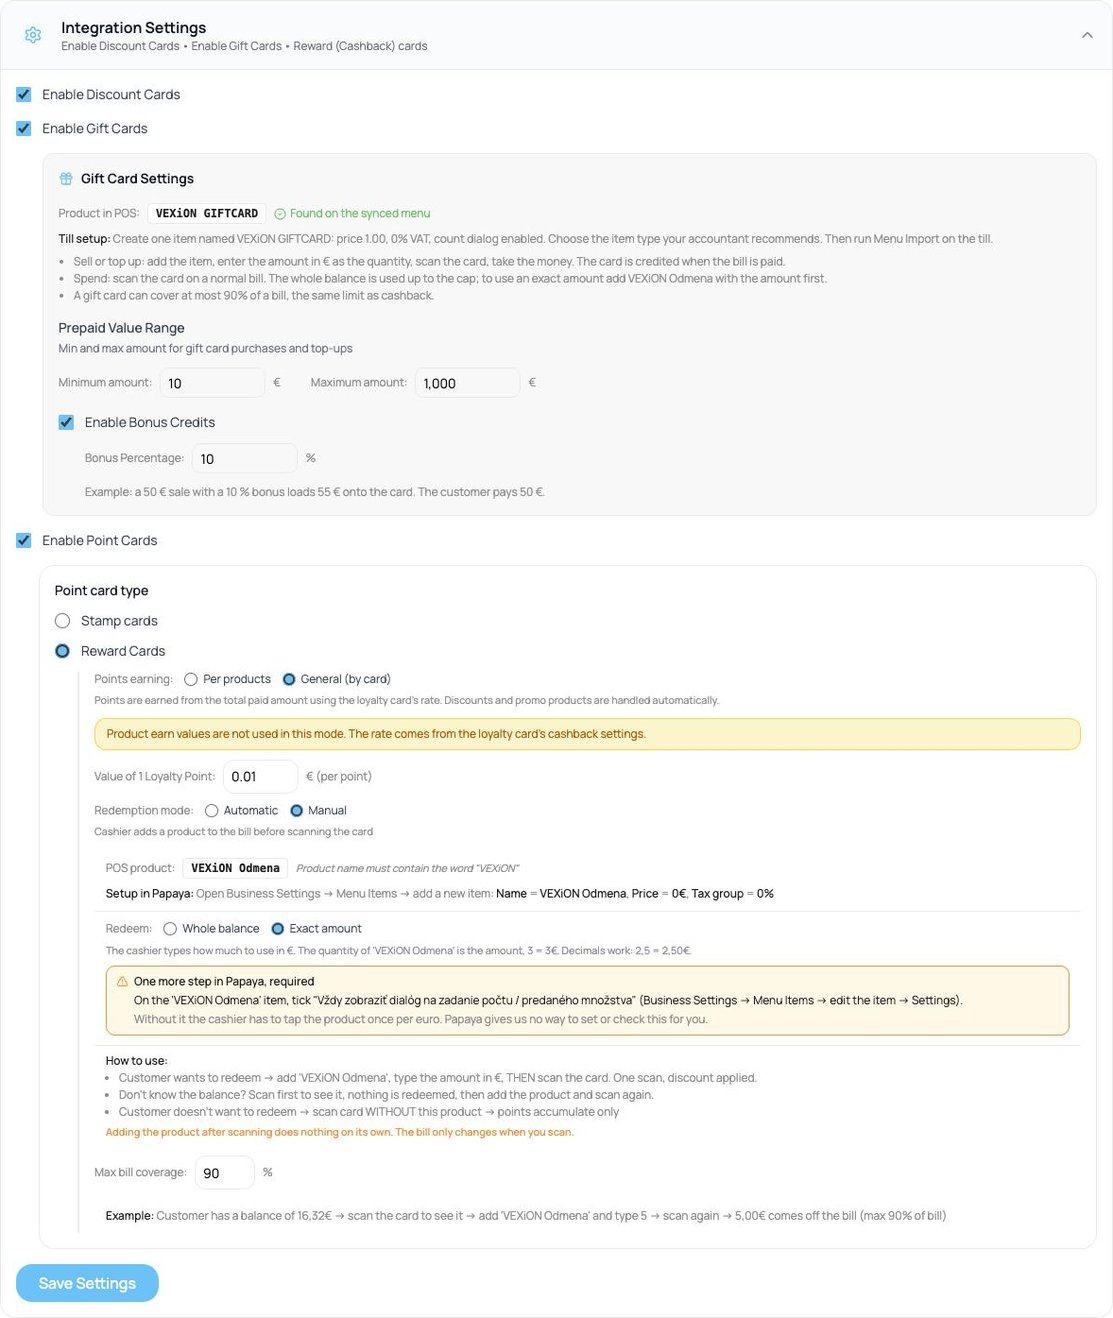
Step 3: card settings
What you see after connecting
Once set up, the Papaya panel shows:- Integration Settings: the card-type toggles you just chose (edit them any time).
- Location dropdown: shows the location you are working on with its product count, next to a Manage Locations button.
- Webhook Configuration: the URLs and token to (re)configure in Papaya.
- Customer Synchronization: how many customers are synced, with a Sync All Customers Now button.
- Sync Menus: pull your products in (see Menu and products).
Customer synchronization
VEXiON registers your customers in Papaya so their cards are recognised at the till. Customers without an email or phone number, and customers whose card type is switched off, are not synced. The Customer Synchronization panel shows how many are synced (for example “685 / 735”) and a Sync All Customers Now button to push them all at once.Papaya keeps a separate customer list per location, so customers are synced to each connected location. Run Sync All Customers Now after your first connection, after adding a location, or after a bulk customer import.
Managing locations
Click Manage Locations to see every connected location, each with its URL, product count, and last-synced time, plus edit and delete controls. The same dialog has an Add Location form (Location Name, Papaya URL, API Token) to connect another. Papaya connects one location at a time, each with its own API token and webhook token. To add another, use Manage Locations (or + Add another location during setup) and repeat the steps with that location’s URL and token.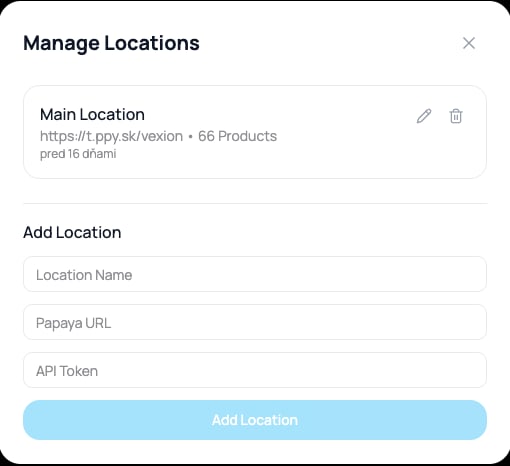
Managing connected locations
Each VEXiON location you map a Papaya till to counts as a billing unit on the graduated per-location pricing. See Mapping locations to VEXiON below.
Mapping locations to VEXiON
There are two separate lists of locations, and a mapping joins them:- Papaya locations are the Papaya accounts you connected, each with its own URL and API token. You manage them in Manage Locations inside the Papaya panel, described above.
- VEXiON locations are your stores in VEXiON, under Settings → Locations. A VEXiON location carries the card design, the wallet geofence, and the per-location billing.
Map POS branches to VEXiON locations for per-location analytics and billing.It lists one row per connected POS system with a count, for example Papaya: 1/1 mapped, and shows an All POS locations mapped badge once nothing is left unmapped. Manage all mappings opens the editor.
Keep this at 1/1 (or n/n). Per-location analytics and the graduated
per-location price both read the mapping,
so an unmapped POS branch is a branch whose sales are not attributed to one of
your stores.