

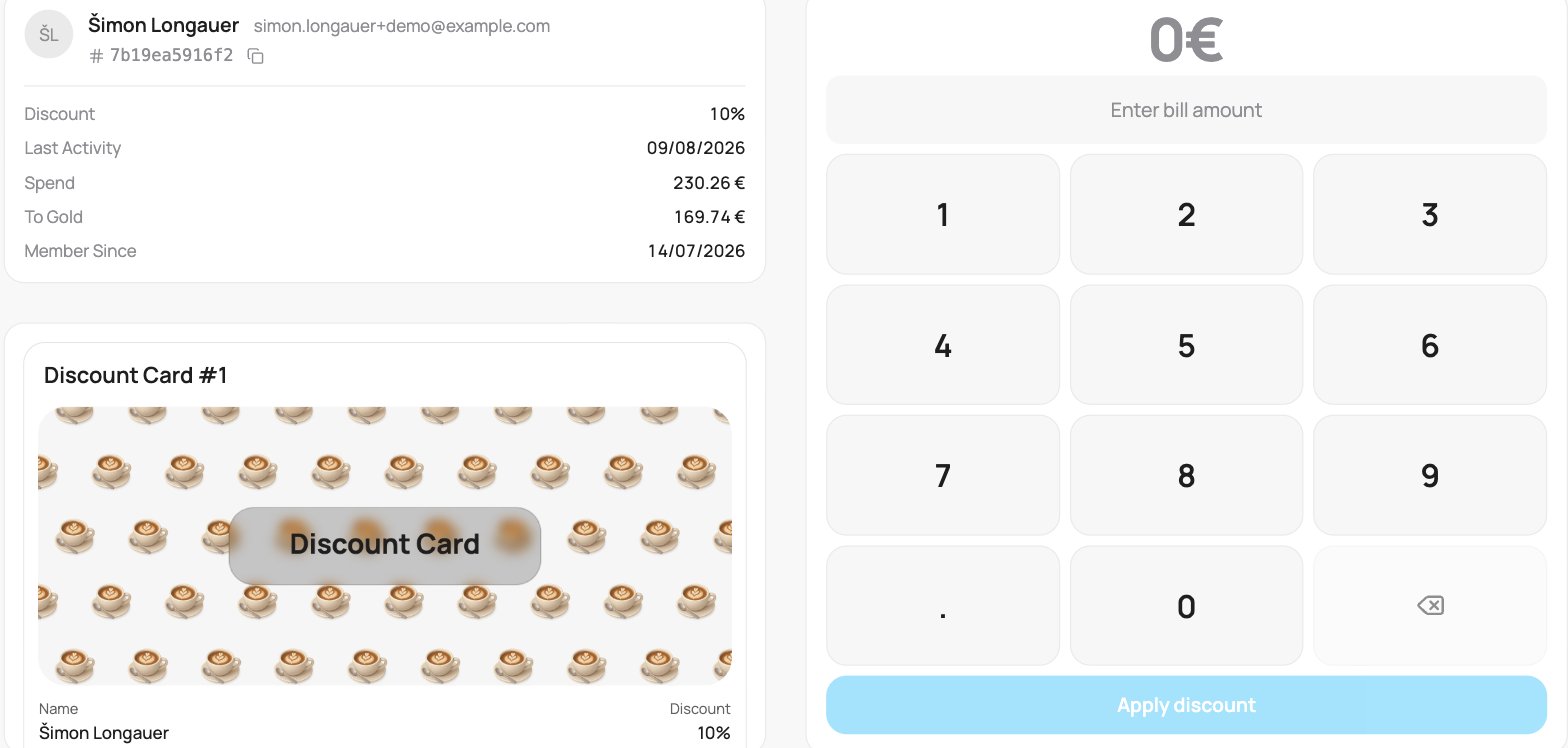
A discount card on the scanner
Apply a discount
1
Enter the bill amount
Type the bill amount on the keypad. As you type, the panel shows how much the customer saves at their current discount, and what they pay.
2
Apply
Tap Apply discount. The button shows the saving (for example “Apply discount 4.50€”). This records the purchase and applies the discount. If the customer is at 0% (they have not reached a tier yet), the button reads Record purchase and simply logs the spend.
On a tiered card, when a purchase pushes the customer past the next threshold, they are promoted for their next visit, not the current one. A short “promoted to [tier]” note appears as you type, so you can tell the customer their new level.
An employee card has a monthly limit instead of tiers. It has its own page.